
Freenove ESP32WROVER CAM Board with Arduino IDE), Onboard
Here is what you need to do to install the ESP32 boards into the Arduino IDE: Open the Arduino IDE. Make sure that you are at version 1.8 or higher, if not then update your IDE with the latest version. Click on the File menu on the top menu bar. Click on the Preferences menu item. This will open a Preferences dialog box.

Programmare ESP32 con IDE Arduino (Introduzione) YouTube
According to Espressif, the ESP-WROVER-32 is a powerful, generic WiFi-BT-BLE MCU module that targets a wide variety of applications ranging from low-power sensor networks to the most demanding tasks such as voice encoding, music streaming and MP3 decoding. For advanced users only! This product is just the module - which can be difficult to use.

ESP32 Devkitc V4 Wrover B IPEX
The abbreviation for bit is b, and the abbreviation for byte is B.. #2. I am observing some constant serial junk output coming out on Termite/Arduino Serial Monitor; so upgraded to SDK 2.1.0 (only change seems to be "boot_v1.7.bin"); but this constant serial junk output issue is still open.. I normally use the Arduino IDE's serial.
Programming the ESP32 with Arduino Code • Wolles Elektronikkiste
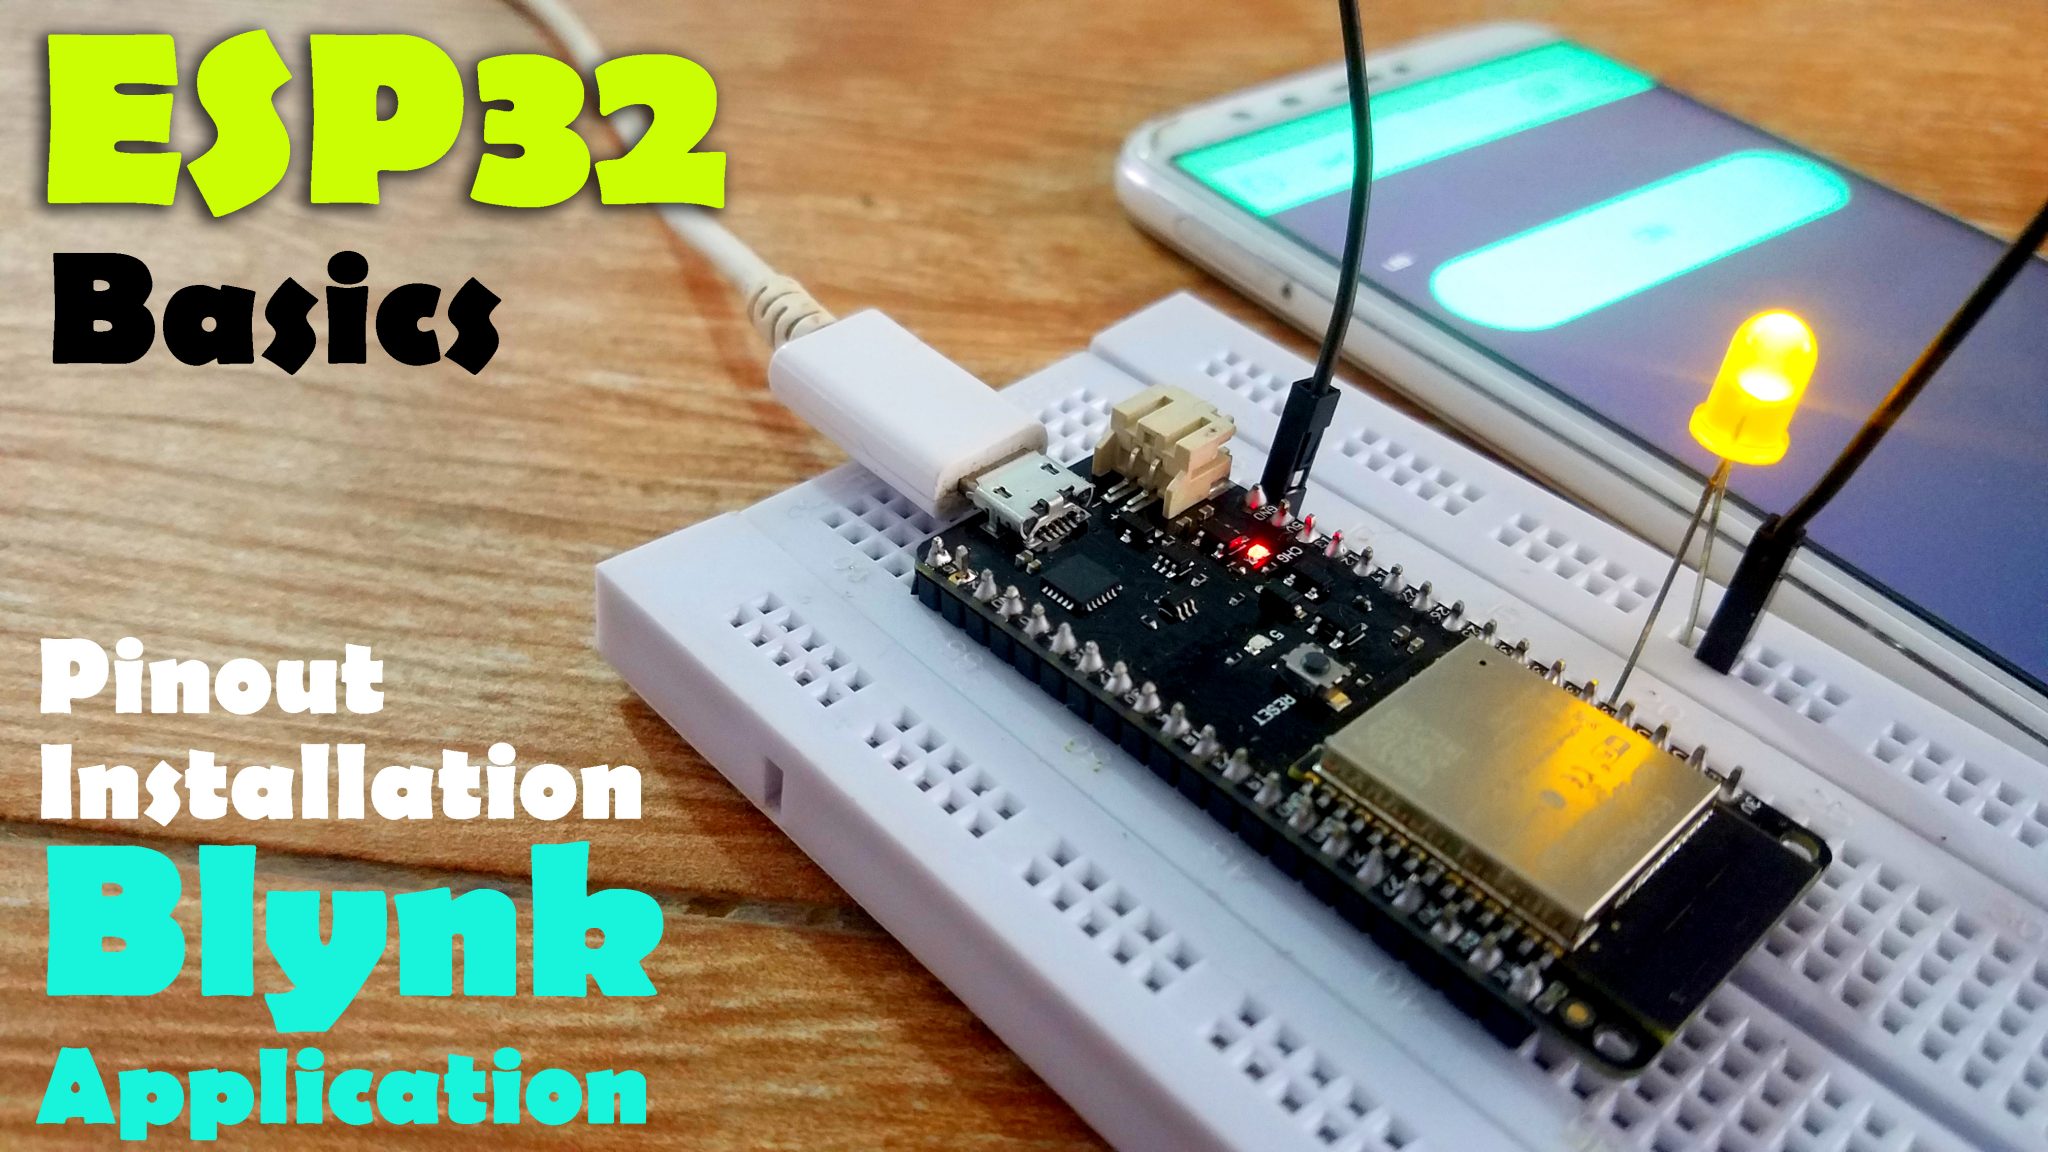
Go to Tools > Board > Boards Manager… Search for ESP32 and press install button for the " ESP32 by Espressif Systems ": That's it. It should be installed after a few seconds. Testing the Installation Plug the ESP32 board to your computer. With your Arduino IDE open, follow these steps:
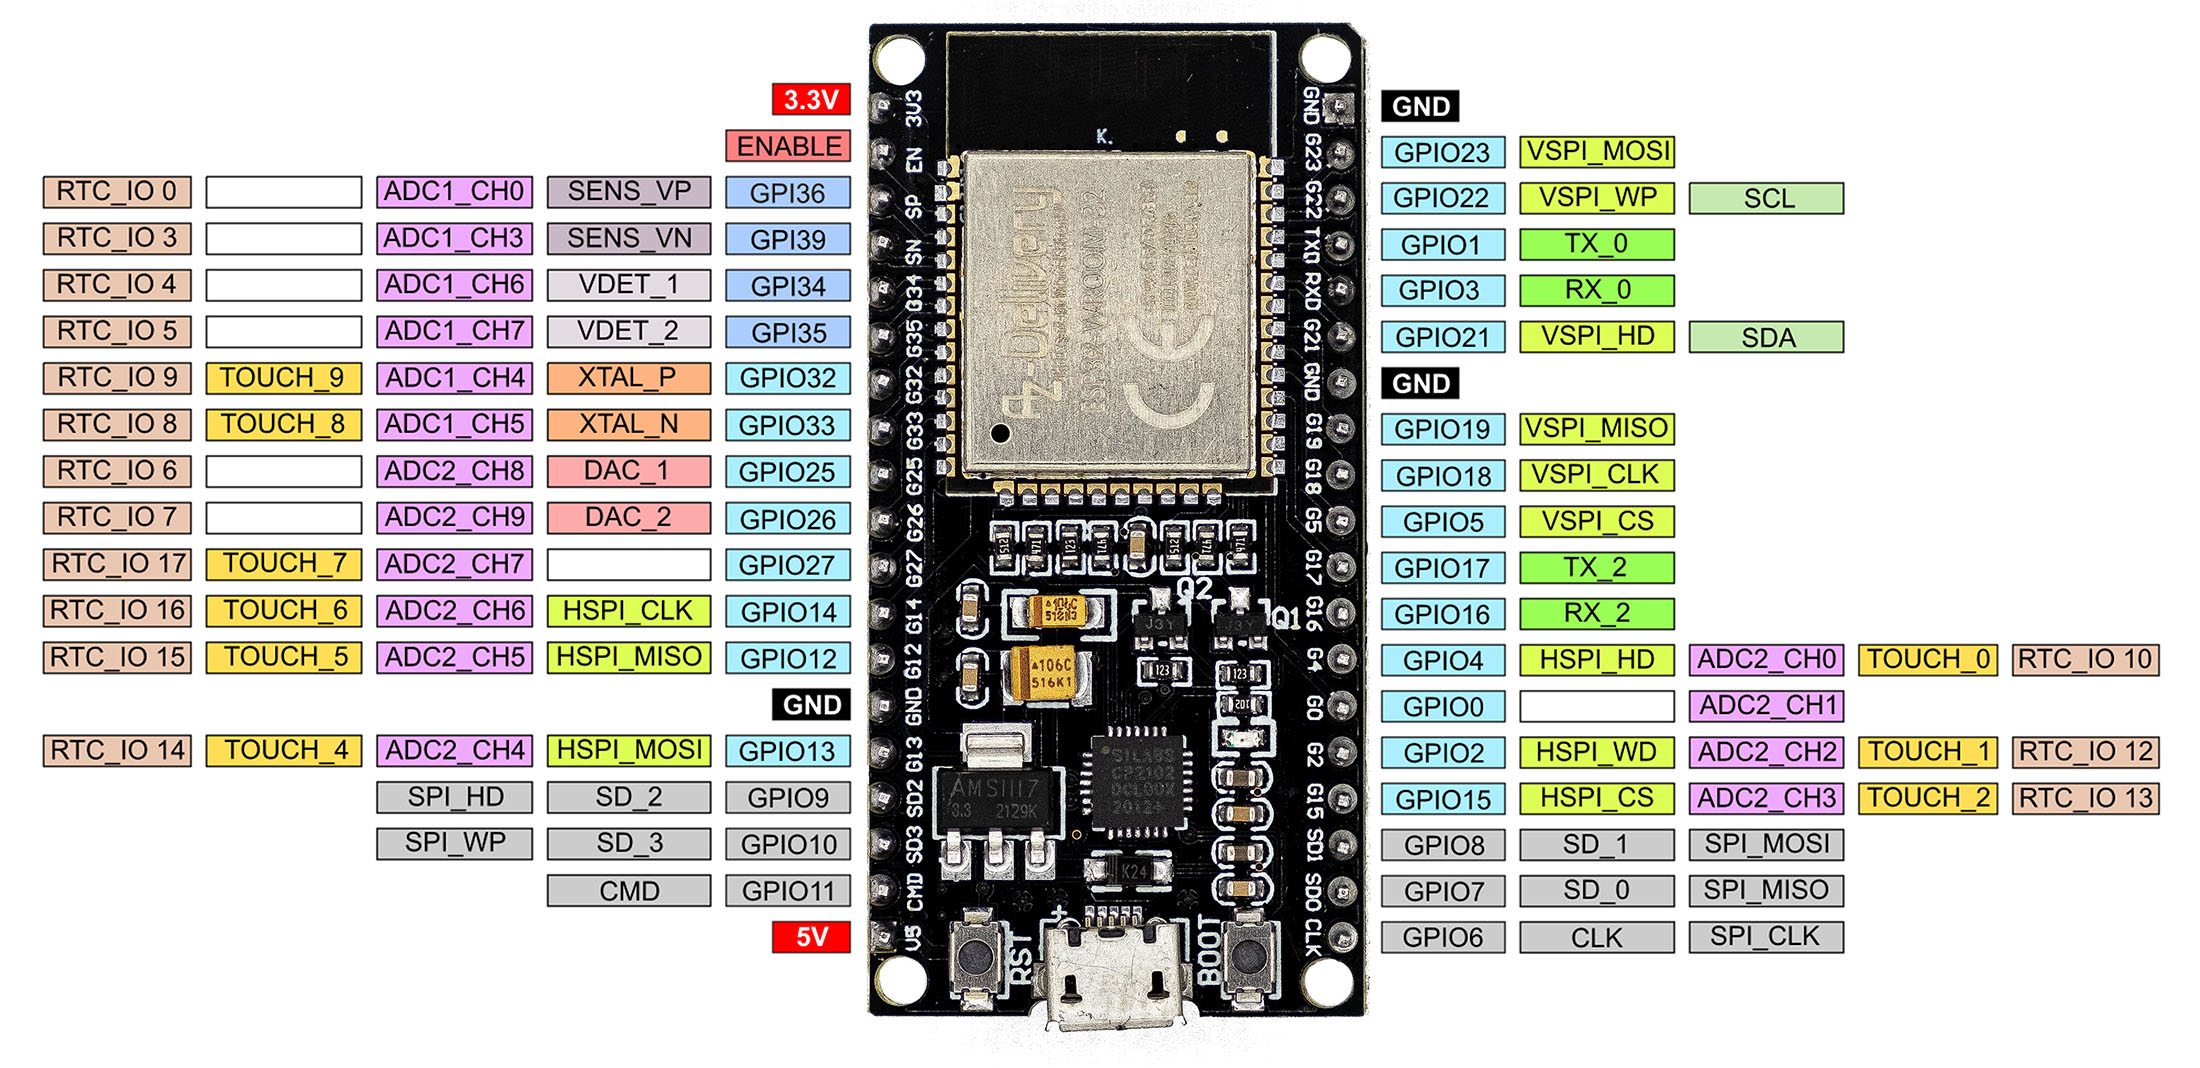
Freenove ESP32Wrover CAM Board Overview and Pinout Maker Advisor
At the end of the compile, it gives a % used of program & data (RAM) The figure for data matches the board config line (WROVER board shown): esp32wrover.upload.maximum_data_size=327680 So using the WROVER board config will mean that the % used could be greater than 100% Whether the compile will fail and abort any upload is a question I don't know
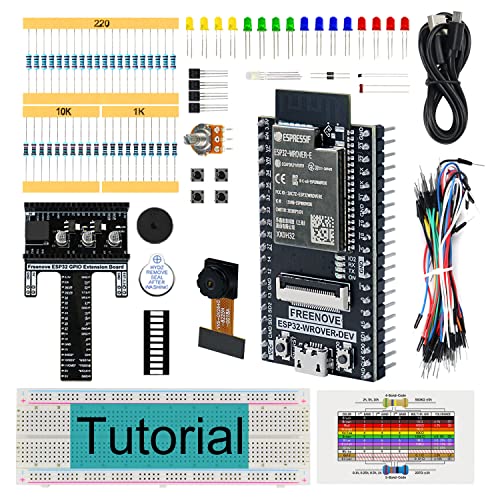
Freenove Basic Starter Kit for ESP32WROVER (Contained)
The LILYGO T-SIM7000G is an ESP32 development board with a SIM7000G chip. This adds LTE (4G), GPS, and GPRS to your board. This means that with this board you can send SMS, get location and time using GPS, and connect it to the internet using a SIM card data plan. This board doesn't support phone calls. Besides the SIM7000G module, the board.

Tout savoir sur la carte uPesy ESP32 Wrover DevKit
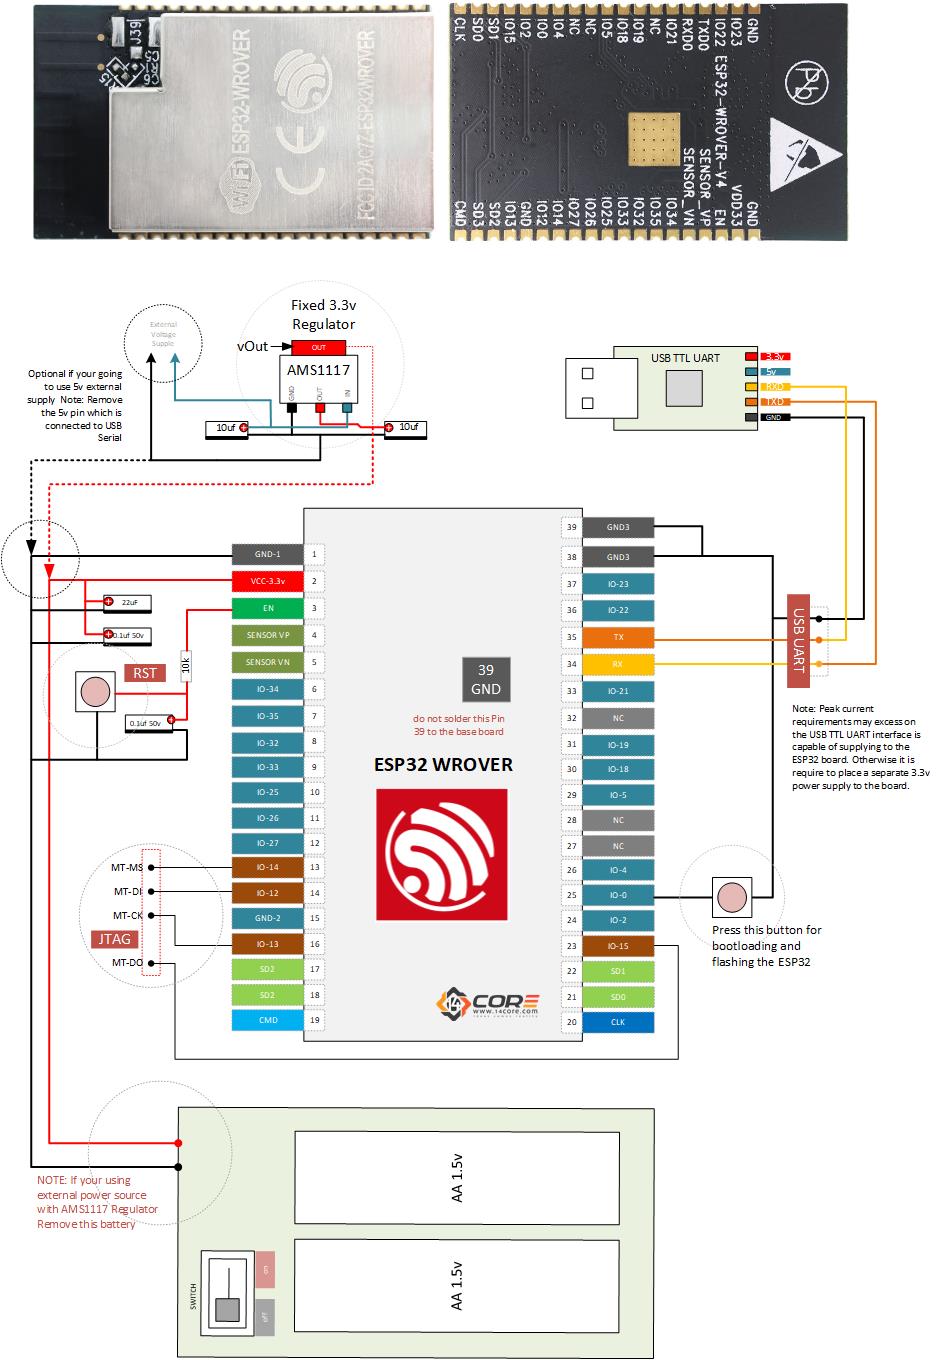
ESP32-WROVER-B is Espressif Systems' new and powerful module which comes in two versions, with a PCB antenna or with an IPEX connector. The module has a 4MB external SPI flash and an additional 8MB SPI Pseudo Static RAM (PSRAM). This marks a big improvement on ESP32-WROVER and ESP32-WROVER-I.
Flashing ESP32 WROVER IDE 1.x Arduino Forum
Finally AMOLED display on the development board. This is T-display S3 AMOLED, esp32 board programmed in Arduino IDE. This display looks amazing. It will be hard to return to LCD screens. In comments you can find the whole video with instructions , links and free code examples.
ESP32 开发入门 使用 Arduino IDE 知乎
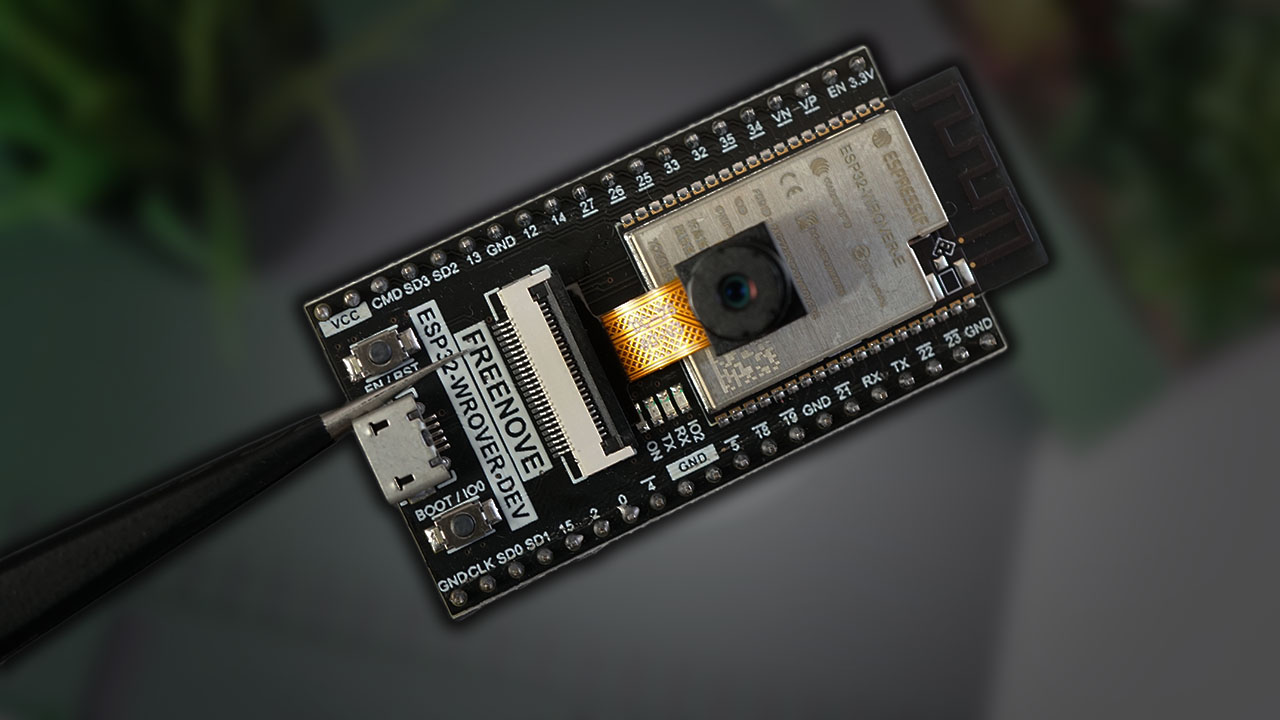
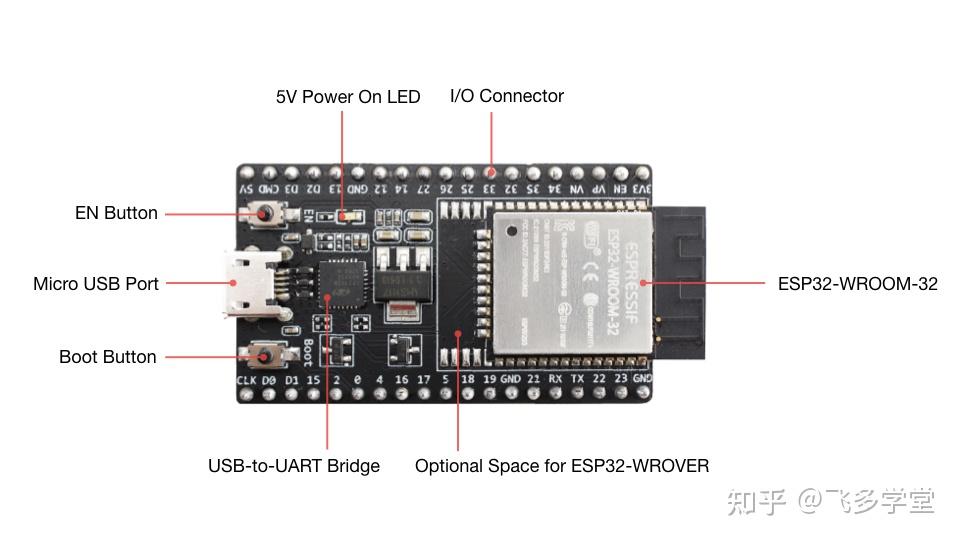
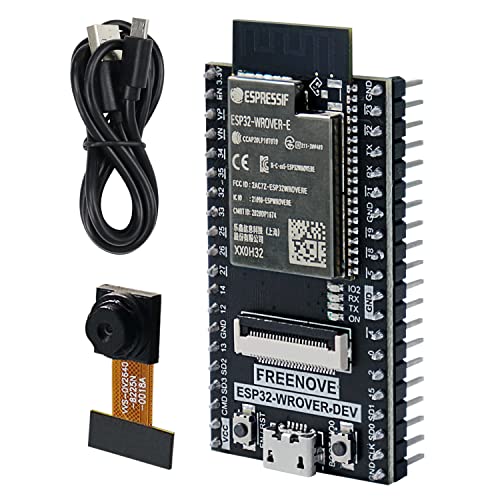
The Freenove ESP32-Wrover CAM board is an ESP32 development board with the ESP32-Wrover-E chip (with 4 MB PSRAM) and an OV2640 camera. It has a USB-to-UART converter so it's straightforward to upload code to the board. You just need to connect a USB cable to the board and connect it to your computer to upload code or apply power.
Programming the ESP32 with Arduino Code • Wolles Elektronikkiste
Table 3: ESP32WROVERB & ESP32WROVERIB Specifications Categories Items Specifications Certification RFcertification See certificates for ESP32-WROVER-B and ESP32-WROVER-IB Bluetoothcertification BQB Greencertification RoHS,REACH Test Reliablity HTOL/HTSL/uHAST/TCT/ESD Wi-Fi Protocols 802.11b/g/n(802.11nupto150Mbps)
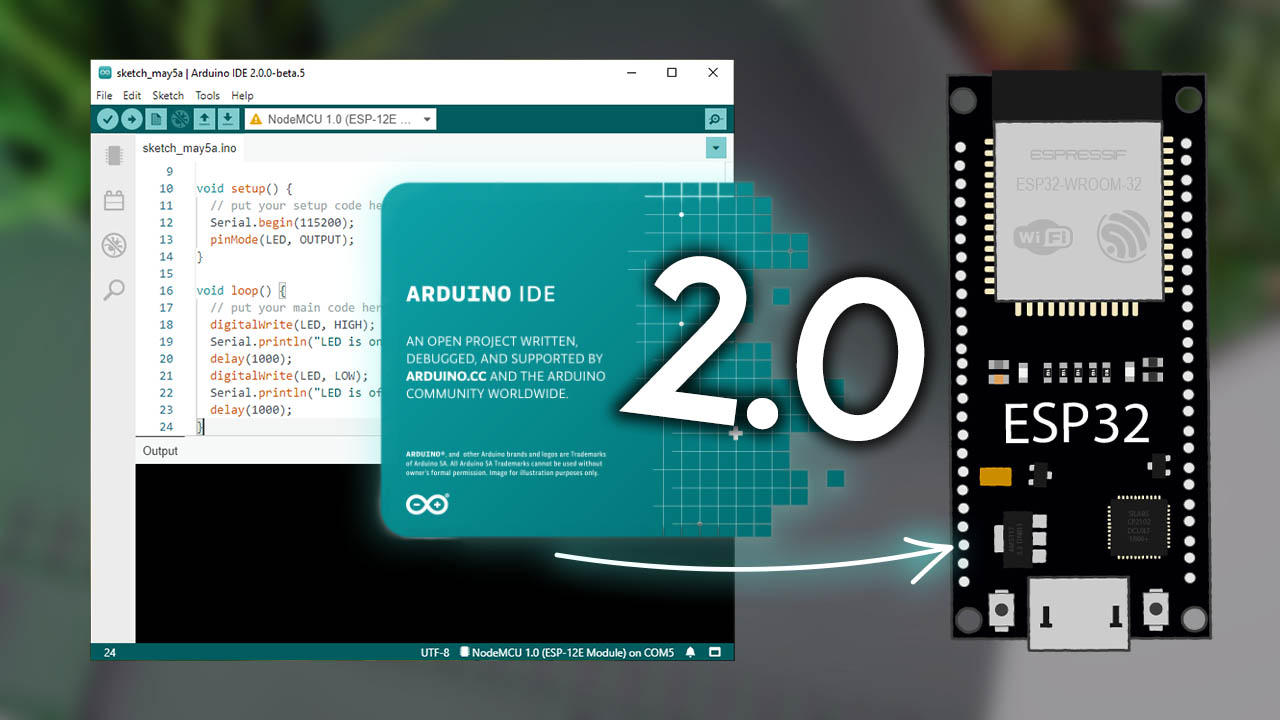
Installing ESP32 Board in Arduino IDE 2.0 (Windows, Mac OS X, Linux) Random Nerd Tutorials
Step 1: Introduction The ESP32-Wrover-Kit has many features beyond the ESP32 module. In this kit, we have a built-in 3.2"LCD display, a high-speed Micro-SD card interface, and a VGA camera interface. The I / O pins were removed from the ESP32 module for easy extension.
ESP32 Arduino IDE Board Manager Installation “ESPRESSIF ESP32”
Table 3: ESP32WROVERE & ESP32WROVERIE Specifications Categories Items Specifications Certification RFcertification See certificates for ESP32-WROVER-E and ESP32-WROVER-IE Test Reliablity HTOL/HTSL/uHAST/TCT/ESD Wi-Fi Protocols 802.11b/g/n(802.11nupto150Mbps) A-MPDUandA-MSDUaggregationand0.4µsguardin-tervalsupport.

مجموعة Freenove الأساسية للمبتدئين ESP32WROVER (متضمنة) (متوافق مع Arduino IDE)، كاميرا داخلية
ESP-WROVER-KIT is an ESP32-based development board produced by Espressif. ESP-WROVER-KIT features the following integrated components: ESP32-WROVER-E module LCD screen microSD card slot Another distinguishing feature is the embedded FTDI FT2232HL chip, an advanced multi-interface USB bridge.

Install ESP32 in Arduino IDE easily
Esp32 wrover ib configuration with Arduino ide Software IDE 2.x prajil May 4, 2023, 5:12am 1 Hi I'm using https://raw.githubusercontent.com/espressif/arduino-esp32/gh-pages/package_esp32_index.json board library for esp32 boards. Now I'm try to build a program in ESP32-WROVER-IB 16M 128Mbit. I'm also trying to use OTA and PSRAM.
Freenove Placa ESP32WROVER con cámara WiFi Bluetooth
Programming ESP32 Board with Arduino IDE Note: This tutorial was written after Arduino has officially launched its support for ESP32 boards. So if you have followed the old method of using GIT to install the boards then you would have to follow these steps again (highly recommended) if you need support for new libraries.
214 New Easier ESP32 installation in Arduino IDE (How to) YouTube
There are several libraries available to easily send and receive LoRa packets with the ESP32. In this example we'll be using the arduino-LoRa library by sandeep mistry. Open your Arduino IDE, and go to Sketch > Include Library > Manage Libraries and search for " LoRa ". Select the LoRa library highlighted in the figure below, and install it.